Installing Base Cabinets in Out-of-Level Kitchens: A Contractor’s Guide

- Share this:
- Share on Facebook
- Pin on Pinterest
- Tweet on Twitter
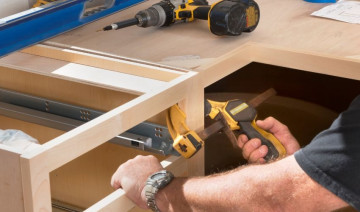
Installing base cabinets in a kitchen with uneven floors can be a challenging task, but with the right tools, preparation, and techniques, you can achieve a professional finish that ensures functionality and aesthetic appeal. Uneven floors are a common issue in older homes or spaces that have settled over time. Addressing this problem during cabinet installation is crucial to prevent gaps, misalignments, and long-term functionality issues. Here’s a step-by-step guide for contractors and DIYers alike to get the job done right.
Step 1: Assess the Level of the Floor
Before starting the installation, assess the floor’s level. Use a long level or laser level to check for dips, humps, or slopes in the kitchen floor. Mark the high and low points so you have a clear idea of the floor’s condition. Understanding the variations in the floor will help you plan adjustments for the cabinet installation.
Step 2: Find the High Point of the Floor
Locate the highest point of the floor along the wall where the cabinets will be installed. This is the reference point for leveling your cabinets. All other cabinets will be adjusted to match this height, ensuring that the countertop will be level even if the floor is not.
Step 3: Mark a Level Line for Reference
Using a laser level or chalk line, mark a level line on the wall above the high point of the floor. This line should represent the height of the cabinet bases. Typically, base cabinets are 34 ½ inches tall to allow for standard countertop heights (36 inches total when the countertop is installed).
Step 4: Shim for a Solid Foundation
Shims are your best friend when working in an out-of-level kitchen. Start with the cabinet that will be placed over the high point of the floor. Install the cabinet and use wooden or composite shims under the base to make it level both side-to-side and front-to-back. Secure the shims in place, ensuring the cabinet is stable and doesn’t wobble.
For adjacent cabinets, repeat the process while aligning the tops with your reference line on the wall. Shims will help raise the cabinets to match the height of the high point. Use a level to ensure that all cabinets are perfectly aligned across their tops for a seamless countertop installation.
Step 5: Secure Cabinets to the Wall
Once the cabinet is properly leveled, secure it to the wall using screws and cabinet brackets. Ensure the screws are driven into wall studs for stability. Check alignment as you install each cabinet to ensure they remain level and flush with one another.
Step 6: Trim Excess Shims
After all the cabinets are securely installed and level, use a utility knife or saw to trim any shims that extend beyond the cabinet base. This will give the installation a clean and professional appearance.
Step 7: Install Filler Strips and Toe Kicks
In kitchens with significant floor variations, gaps may appear between the cabinet bases and the floor. Install toe kicks to cover these gaps and create a polished finish. If necessary, use filler strips to address gaps between cabinets and walls, ensuring a seamless look.
Step 8: Prepare for Countertop Installation
With the cabinets installed and leveled, the base is now ready for countertop installation. Double-check that the cabinet tops are level across the entire run, as uneven cabinets can cause problems when the countertop is installed.
Tips for Success
- Use Quality Tools: A laser level, shims, and a good set of clamps can make a huge difference in the accuracy and ease of your installation.
- Plan for Variances: Don’t rush through the leveling process. Small misalignments can create larger problems when it’s time to install countertops, appliances, or backsplashes.
- Double-Check Measurements: Consistently measure and check for level alignment as you go. It’s much easier to correct an issue before securing cabinets to the wall.
- Work in Pairs: Cabinet installation is much easier with two people. One person can hold the cabinet in place while the other works on leveling and securing it.
Final Thoughts
Installing base cabinets in an out-of-level kitchen may take extra time and effort, but the result will be a beautiful, functional kitchen that stands the test of time. Whether you’re a contractor working on a client’s home or a DIYer tackling your own renovation, careful preparation and attention to detail are the keys to success.
With the right equipment and expertise, you can overcome uneven floors and create a kitchen that’s both stylish and functional.
About us
In business since 1968, Johnston's Building Materials has much to offer any contractor.
Retail Building Materials supplier of roof trusses, metal roofing, dimensional framing lumber, pressure treated lumber, plywoods/OSB, vinyl windows, steel doors, garage doors, vinyl siding, sheetrock, insulation, etc. Our engineered roof trusses made on premises. Custom sizes and styles available.

Comments